So last week I showed you our dark hole of a laundry room, and that we were planning to use the cabinets from the 'man cave' for storage. They are nice sturdy wood cabinets, but they were a little worse for wear. Which is fine, since I wasn't the biggest fan of the finish on them anyway. I'm going for 'clean and bright' in the laundry room, so I thought white would be a good choice!

First we took the doors off the cabinets, and then removed the hardware. I actually really like the dark handles that are on them, so those will be staying. Once they were disassembled, we sanded them. These only needed a light sanding, since they didn't have a super glossy finish. If you are painting something that has a lot of varnish on it, you probably want to wipe it down with a deglosser before you paint.


So once that prep was done, it was time to prime. One coat of kilz did the trick. We used little foam rollers to give the doors and cabinets a nice, even coat. Then came two coats of paint. Just a white paint from Valspar, nothing fancy :) be sure to keep your coats thin, again using a foam roller. I also used an angled brush to get in the grooves of the trim on the face of the doors. Once everything was good and dry, it was time to hang those bad boys up!


I was especially anxious to get them on the wall, since all of my laundry supplies were hanging out on top of the dryer. Along with tools, random stuffed animals, anything else we happened to drop as we came in the door. You get the picture. It was a hot.mess. Anywho, I was pretty anxious to get my cabinets on the job!

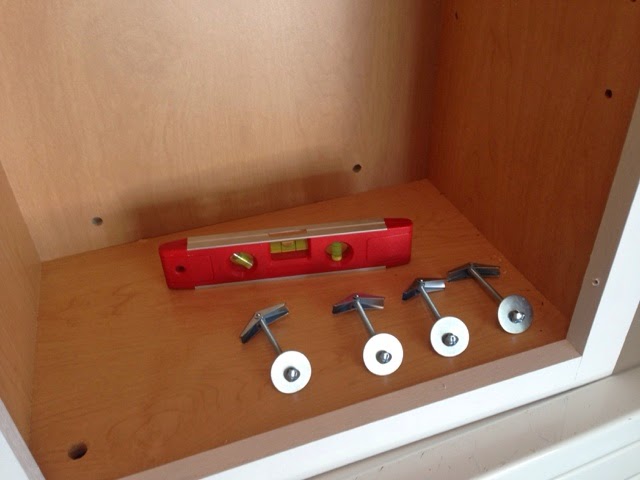
Well hanging them turned out to be a bit of an adventure. We knew we wanted to take a different approach than the previous owner. Although bolts through the wall and into the bathroom might have been fun ;P We planned to just nail them right into a stud. But, after using the handy little stud finder, turns out there aren't any studs behind where I wanted to place the cabinets! So we were going to use the stud that runs along the top of the room. Well, turns out that sucker is metal. Onto plan C- toggle bolts! Thankfully, this method worked like a charm :) hubs got some toggle bolts, rated for 100 lbs each, and put 4 through the back of each cabinet and into the wall. And since I'm only putting laundry detergent and shout in them, I think they'll do the trick quite nicely :) Once the cabinets were in place, we just put the doors and handles back on, and voila! I actually only have enough stuff to fill one of the cabinets right now. But you know what they say, you grow into the space you have!

So that's phase one! I'll be back with an update on a fun wall treatment we did soon :) Have you ever refinished any cabinets? The thought made me nervous in the past, but it turned out to be really easy!


No comments:
Post a Comment